
How to install NextCloud 18 on Ubuntu 16.04/18.04/19.04/19.10
Source: https://www.marksei.com/how-to-install-nextcloud-18-on-ubuntu/
NextCloud is a Dropbox-like solution for self-hosted file sharing and syncing. Installing NextCloud 18 on Ubuntu is trivial.
Step 1: Install software
Important
I take NO responsibility of what you do with your machine; use this tutorial as a guide and remember you can possibly cause data loss if you touch things carelessly.
The first step in order to install NextCloud 18 is to install a web server and PHP. Although you can adapt this guide for many Ubuntu versions I suggest you to stick with Ubuntu 18.04 or higher since PHP7 is included. PHP7 brings many improvements over the past versions and will boost NextCloud too, as a matter of fact PHP7 is required since NextCloud 11. You will need root access during this procedure. The following procedure will install apache as webserver. Input the commands one by one to avoid errors!
Ubuntu >= 18.04Ubuntu >= 16.04
Open a terminal and input the following commands:
Open a terminal and input the following commands:
Step 2: Database selection
Now that you have set up the environment, all that is left is to choose a database that will support the installation. You have three choices:
- SQLite: is a single-file database. It is suggested only for small installations since it will slow NextCloud down sensibly.
- MariaDB/MySQL: are popular open source databases especially amongst web developers. It is the suggested choice.
- PostgreSQL: a popular enterprise-class database. More complicated than MySQL/MariaDB.
Now, this choice won’t really alter the functionality of NextCloud (except if you use SQLite), so pick whatever you know best. If you’re unsure pick MariaDB/MySQL.
SQLiteMySQL/MariaDBPostgreSQL
Install the software:
Or if you prefer MySQL:
During the installation you will be prompted to choose a root password, pick a strong one. If you’re not prompted to choose a password, the default one will be blank. (This is potentially insecure, change it!)
Now you need to enter the database (you will be asked the password you just set):
Now that you are in create a database:
Now you need to create the user that will be used to connect to the database:
The last step is to grant the privileges to the new user:
When you’re done type Ctrl-D to exit.
Install the software:
Now you need to enter the database:
Now that you are in create a database:
Now you need to create the user that will be used to connect to the database:
The last step is to grant the privileges to the new user:
When you’re done type \q and press enter to exit.
Step 3: Install NextCloud
The last step is to actually get the software, configure it and run it.
Ubuntu
With these step we download the software and extract it:
Now we need to create a new file in /etc/apache2/sites-available/nextcloud.conf . Feel free to use whatever editor you feel comfortable with and add the following lines:
Once done it’s time to enable the new site, enable apache mods that are needed by NextCloud and raise PHP’s memory limit:
Step 4: Configuring firewall
This step is essential when your firewall is enabled. If your firewall is enabled you won’t be able to access your NextCloud 18 instance; on the other hand if it isn’t enabled you shouldn’t have any problems and you can simply skip this step.
Tip!
Keep in mind having a firewall enabled is a good security practice and you should already have one enabled.
In order for the firewall to work, it must be enabled. This guide will not includethis part. When you enable a firewall many things can go wrong, e.g. you’re using SSH, you enable the firewall and your connection is cut and can’t connect otherwise, hence you should carefully review the documentation from your distribution.
To open the ports needed by NextCloud 18 follow these steps:
UFWIPtables
UFW is the default firewall in Ubuntu, if you’re using one, you’re probably using UFW.
IPtables is an older firewall (still widely used), if you’re not using UFW you can use IPtables directly.
Step 5: Install
Once you’re done with selecting the database, it’s time to install everything. Head to http://YOUR_IP_ADDRESS/nextcloud/ and you will be facing the following screen:
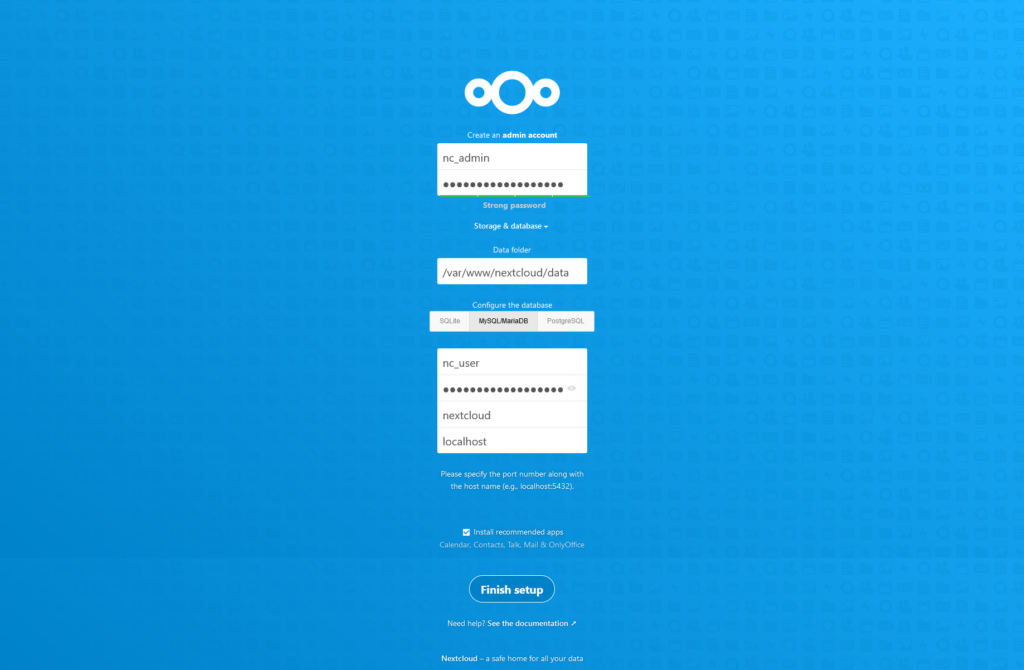
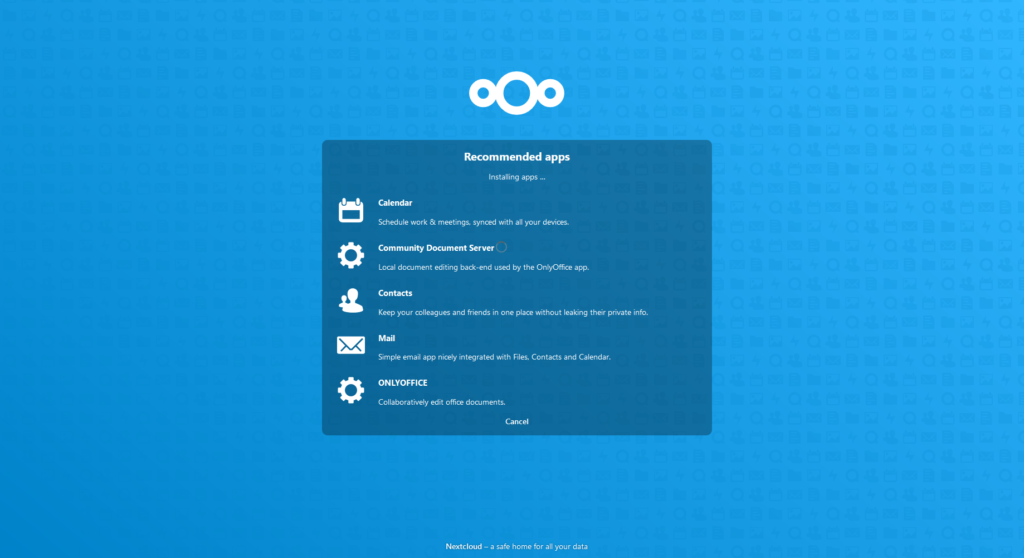
Select an administrator username and password, then you can select the data folder, but if you don’t know what you’re doing it’s best if you leave it with the default value. Then click on “Storage & Database” to select the database you chose during step 2. Fill everything and if you’ve followed all the steps correctly you should be seeing the following screen, after a short while you will be redirected to the second screen:
Step 6: Enable Caching (suggested)
NextCloud is good but it can be very slow if you don’t configure a caching solution. There are two caching solutions covered in this guide:
- PHP OPcache: a PHP inbuilt cache solution that speeds up scripts execution.
- Redis server: a fast in-memory key-value store that speeds up everything in NextCloud.
Enabling OPcache
Ubuntu
Open a terminal and input the following commands:
Now you need to edit a file located at /etc/php/7.2/apache2/conf.d/10-opcache.ini . Replace 7.2 with the version of PHP you have installed. With your favorite editor, edit the file adding the missing lines:
These values are suggested by NextCloud, but you’re free to tweak them to suit your needs. Once you’re done you can restart apache:
Installing and configuring Redis
Ubuntu
Open a terminal and input the following commands:
Now you must configure NextCloud to use Redis. To do so you need to edit the NextCloud configuration file located at /var/www/nextcloud/config/config.php . The file will look like this, add the highlighted lines:
- <?php<br>$CONFIG = array (<br> ‘instanceid’ => ”,<br> ‘passwordsalt’=> ”,<br> ‘secret’ => ”,<br> ‘trusted_domains’ =><br> array (<br> 0 => ‘YOUR_IP’,<br> ),<br> ‘datadirectory’ => ‘/var/www/nextcloud/data’,<br> ‘dbtype’ => ‘mysql’,<br> ‘version’ => ‘15.0.0.10’,<br> ‘overwrite.cli.url’ => ‘http://YOUR_IP/nextcloud’,<br> ‘dbname’ => ‘nextcloud’,<br> ‘dbhost’ => ‘localhost’,<br> ‘dbport’ => ”,<br> ‘dbtableprefix’ => ‘oc_’,<br> ‘dbuser’=> ‘nc_user’,<br> ‘dbpassword’ => ‘YOUR_PASSWORD_HERE’,<br> ‘installed’ => true,<br> ‘memcache.locking’ => ‘\OC\Memcache\Redis’,<br> ‘memcache.distributed’ => ‘\OC\Memcache\Redis’,<br> ‘memcache.local’ => ‘\OC\Memcache\Redis’,<br> ‘redis’ => [<br> ‘host’=> ‘localhost’,<br> ‘port’ => 6379,<br> ‘timeout’ => 3,<br> ],<br>);
These settings will enable NextCloud to use Redis for caching and file locks. Of course these settings are just an example, you can tweak them to suit your needs.
Lastly, restart the webserver:
Step 7: Expose NextCloud to Internet (optional)
Important
Hosting applications available to the Internet is potentially dangerous. In order to keep your applications safe you need to be proficient in system security and to follow security best practices.
Most people will want to access their files from whatever location they are. To do so, your newly created NextCloud instance needs to be connected to the Internet.
Given that you need to take care of port-forwarding (if you’re a home user) and domain configuration (which varies according to your provider), here you can find the instructions to create a virtual host with Apache.
Ubuntu
Using your favorite text editor, edit the file we created previously at /etc/apache2/sites-available/nextcloud.conf . And make it look like this:
It is important to set ServerName according to a domain you own and have configured correctly. Now you need to add YOURDOMAIN.TLD to the trusted domains in the NextCloud config file. You can do so with the following command:
Once you complete this step you won’t be able to access NextCloud through http://YOUR_IP_ADDRESS/nextcloud anymore. Instead you will be able to access it through http://YOURDOMAIN.TLD (notice /nextcloud is gone).
Lastly, restart the webserver:
Step 8: Get a free SSL certificate with Let’s Encrypt! (SUGGESTED!)
Now that you have your NextCloud instance up and running you’re good to go, but beware: you’re not safe. Internet is a dangerous place for your data and you will most likely need an SSL certificate to ensure your communications are encrypted. Provided you own a domain name you can get one for free using Let’s Encrypt! No catches, free forever.
Warning!
Let’s Encrypt has rate limits in place to prevent inappropriate usage of the CA. There’s a limit on the numbers of attempts you can do before getting a temporary ban. During this setup, if things go wrong, I suggest you to use the –staging option to avoid the temporary ban. The –staging option will use a testing server and will not issue valid certificates. When you have completed the procedure against the test server successfully, you can remove the –staging option to obtain the real certificate.
Ubuntu
Open a terminal and input the following commands:
Now you will run the command to install a certificate, follow the procedure and you will get everything configured out of the box:
Lastly, restart the webserver:
If you need further help you can follow my other tutorial on Let’s Encrypt on Ubuntu (the apache part).